If you try to mix all the different elements of a track using only the volume faders on your mixer, you’ll find that everything quickly descends into woolly, distorted mess. Your speakers are only capable of producing so many frequencies at once, so if you try to feed them, kick, snare, hat, bass and lead synth all at the same time, they’ll struggle to reproduce it accurately.
If you listen to professionally produced track, you’ll notice that you can hear all the elements and instruments individually, and nothing overpowers anything else.
When producing your own music, it’s a good idea to have a “reference track” for comparison. While working on your mix you can refer to an example of what you consider “good” production and see how it compares to your track. You’ll probably notice that hi-hats are far quieter than the rest of the kit, and that the bass part is significantly higher in pitch than you would expect.
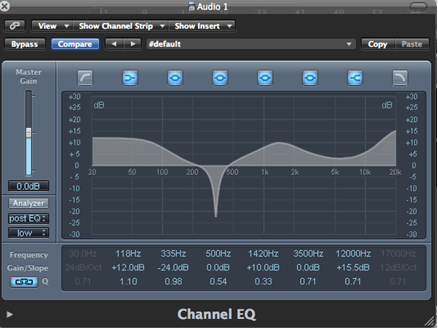
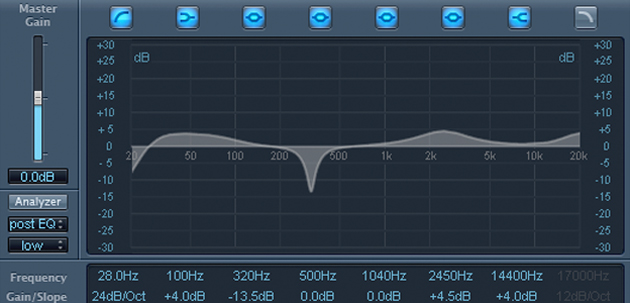
Parametric and Paragraphic Equalization plug-ins allow you to boost and cut frequencies within a sound, funneling each sound into specific bands. This allows you to separate all the distinct sounds within your track, giving each one its own space, and allowing it to be heard on its own, without being muddied by anything else.
The following examples are guidelines to give you an idea of where in the frequency band you should locate each instrument, in practice, you can set the boundaries wherever they sound good, the important thing is to avoid overlaps between different elements.
Drums
Boosting the signal at around 50hz will produce more “boom” from the kick and toms, and raising it a little more at around 100Hz will create a more solid sound from these low-end percussion pieces. The snappy punch of a snare can be accentuated by boosting the sound around the 200-400Hz mark, and 6-10KHz can be boosted to bring out the sparkle of cymbals and hi-hats.
Basslines
You can give a sub-bass more weight by boosting around the 50Hz range, but be mindful of the other instruments you have occupying that same area. The long wavelength of sounds at these frequencies means that there is a greater chance of them cancelling one another out, leaving you with silence. If your track has a huge, meaty sub-bass part, it’s a good idea to pitch your kick drum a little higher, making sure both can be heard.
Guitars
Guitars or other high-frequency instruments occupy a broad space in the middle of the band. Depending on the tone you’re looking for, you can create anything from a thick, chunky rhythm sound to a piercing solo lead. Emphasizing the 200Hz range will thicken a sound, while the 1-3kHz range can make them more cutting and aggressive.
Boosting many frequencies at the same time is a quick way of overcrowding your track, making it sound weak and woolly. If everything is competing with everything else, nothing will have the “space” we are trying to create. A good rule of thumb to prevent this is to always remove more than you add to a given sound. Though you always want to create an emphasis on a particular frequency band, the vast majority of sound outside that band will be surplus to requirements. Cutting it out will give your overall mix a cleaner sound.
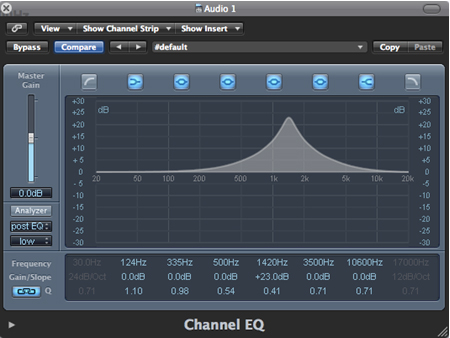
For instance, you might want to give a guitar sound more bite by boosting the high mid-range. This will sound great on its own when you have the solo button pressed on that particular track. 1.4kHz is right in the upper end of the guitar’s standard range. However, if you follow this same approach for all the channels in your track, your overall mix will be crowded and distorted, and no one instrument will carry any weight.
A better approach would be to cut all those areas of the frequency band that are of no interest to you, and apply a much more subtle boost to the desired band.
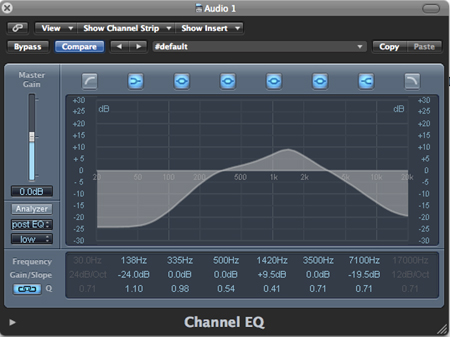
Listen to the track in solo mode and there’ll be no real difference between it and the first method, but amplified over a dozen or so tracks, the cumulative effect of chopping out all those unwanted extreme frequencies will make a big difference.
EQing is about fifty percent science, fifty percent art. You can provide guidelines for where to place sounds in the mix, but its ultimately dictated by what sounds good to you. However, following these principles can make it easier to avoid the common mistakes and pitfalls that often catch out the new producer.
